So a few weekends ago I had a Bridesmaid Tea that I attended for my my childhood friend who is got married this past Saturday. I didn’t know what to get her besides the normal registry list items. I don’t know about you, but I hate to follow registries. I love to make them 😜 but I like to get creative in my presents I give and most of the time that means I need to deviate from their registry.
This couple are so meant for each other! I have known Mallory since we were in diapers, she lived two houses down the road from me. She met Ben a few years ago and I am so happy to see the joy and love they have for each other.
I wanted to make them something for their new apartment for after the wedding and what a better thing than an established name sign!!
I was able to make this sign out of thing I had laying around the house and it took me about an hour and a half. I hope you enjoy this tutorial as much an I loved the finished project! I can’t wait to make more of these for Christmas presents!!!
Materials:
- Piece of wood (I used pine)
- Pencil
- Print out of name you want to copy in right size and typography
- Acrylic paint
- Stain
Optional:
- Picture hanging hardware
- Polyurethane (if hanging outside)

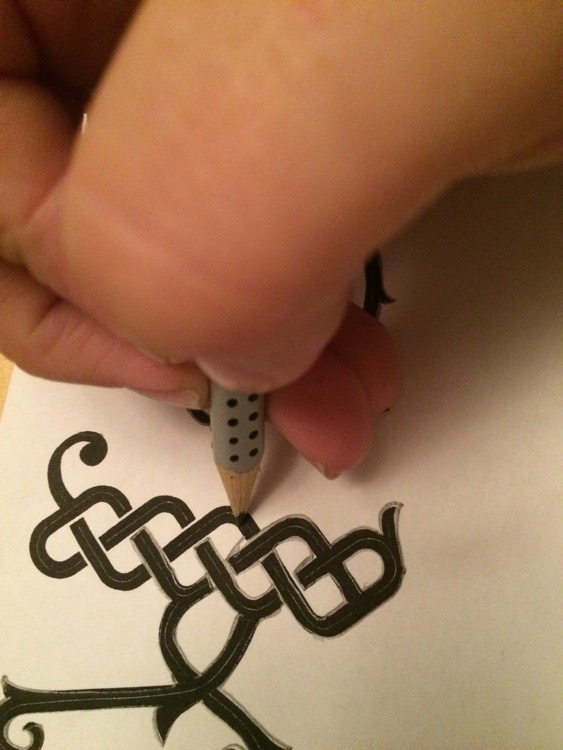

I Started by tracing the printed out letters onto the wood. If you use a heavier wood than pine, you will have to rub charcoal on the back of the print out first. But since pine is soft it left an imprint in the wood that I could paint over after.
After you’re done tracing the letters, you can start painting! It is very important that you choose a paintbrush that has short bristles. Or else you will have a lot of feathering on the edge of your lines.
Let your paint dry overnight! This is important so that it dries completely before you put the stain on or it might smudge the paint.
You can stain it any color you like, any way you like. I had this stain left over from a project I did a few years ago so it was perfect!
After you’re done, you can either add a couple layers of polyurethane or clear sealer if your sign will be exposed to the elements. You can add hanging hardware or a chain. Whatever way you make it, make it yours!

Stay Crafty!
